
How to Plan Container Foundation Drainage
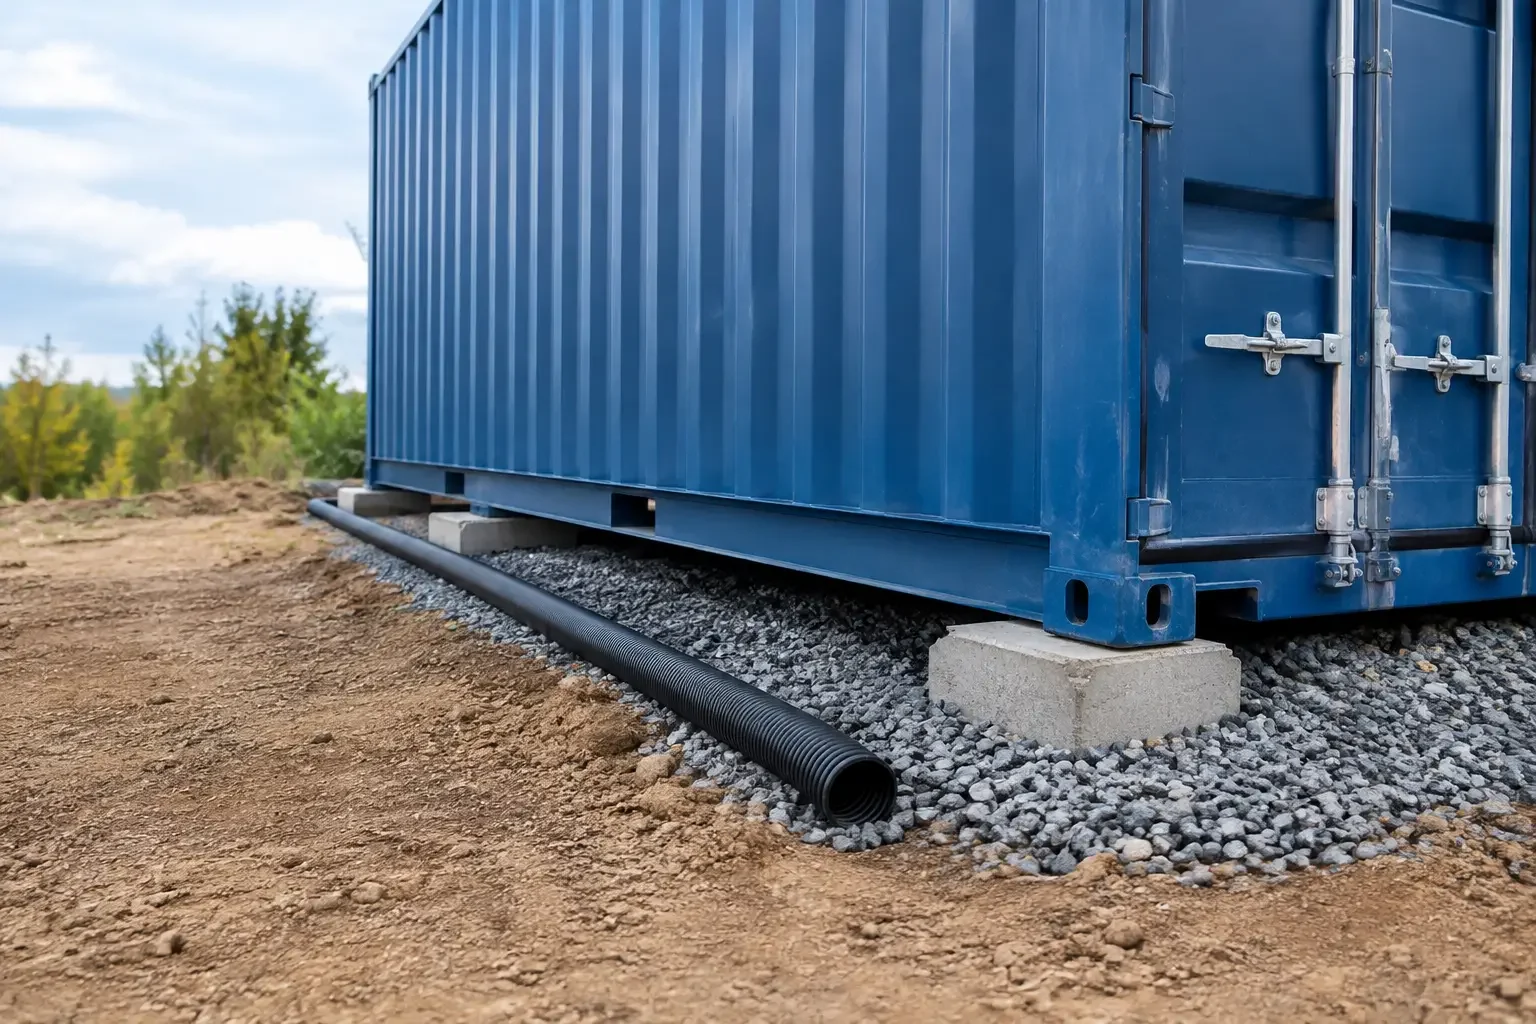
A shipping container can arrive structurally sound, level on delivery day, and ready for work. Then the first sustained rain exposes the real site issue: water collecting beneath the frame, softening the soil around supports, and leaving doors out of alignment. To plan container foundation drainage correctly, treat the container, its foundation, and the surrounding grade as one operating system.
This applies whether the unit is a 20-foot storage container behind a warehouse, a 40-foot jobsite office, a refrigerated container with utility connections, or part of a larger modular build. Good drainage protects the site investment, preserves access, and reduces maintenance that is far more disruptive once the container is loaded or occupied.
Start with the Site, Not the Container
The right foundation is determined by what is below and around the container. A level-looking site can still hold water because of compacted clay, an uphill runoff path, a high water table, or poor drainage from nearby roofs and pavement.
Before selecting gravel, blocks, piers, or a concrete slab, identify where surface water goes during a heavy rain. Look for low spots, existing swales, downspouts, irrigation discharge, and vehicle traffic that may redirect runoff toward the container. If the site is near a drainage channel, in a flood-prone area, or subject to local stormwater requirements, involve the appropriate civil engineer or local authority early.
The operational use matters as well. A lightly loaded storage container may perform well on a compacted gravel pad with properly placed supports. A container office with frequent foot traffic, electrical service, HVAC condensate, and accessibility requirements may need a more developed pad, walkways, and positive drainage away from entry doors. Heavily loaded containers, stacked units, and permanent occupied structures require foundation design based on actual loads, soil capacity, wind exposure, frost depth, and local code.
Plan Container Foundation Drainage Around Positive Grade
Positive grade means finished ground slopes away from the foundation rather than toward it. As a practical starting point, many sites use a slope of about 5 percent for the first 10 feet around the container where site conditions allow. That equals roughly 6 inches of fall over 10 feet. The objective is simple: rainfall should move away from the container without creating erosion or sending water onto an adjacent property.
Do not rely on the container floor to solve a drainage problem. Shipping containers have a strong steel perimeter frame and are designed to transfer load through their corner castings, but they are not intended to sit in standing water. Persistent moisture under the unit can accelerate corrosion on the underside, encourage vegetation, create pest habitat, and make future leveling difficult.
On a relatively flat site, grading may direct water to a shallow swale on the downhill side. On a sloped site, an uphill diversion swale or berm can intercept runoff before it reaches the container pad. The best approach depends on the amount of water, soil type, available discharge area, and local requirements. Drainage must have a safe destination. Moving water away from the container only to create a muddy access lane or flood a neighboring area is not a solution.
Keep support points above surrounding grade
Container support points should sit on a stable, prepared base and remain above the surrounding finished grade. This helps water pass around the foundation instead of pooling against steel components.
For many ground-level storage applications, a compacted crushed-stone pad provides a durable drainage layer. The pad should extend beyond the container footprint so rain does not fall directly from the container sides onto soft native soil. An oversized pad also gives delivery crews and users a cleaner, firmer working area around the doors.
Use angular crushed aggregate rather than rounded river rock when the pad must support container loads. Angular material interlocks and compacts more effectively. Where native soil is weak, wet, or prone to mixing with aggregate, a properly selected geotextile separation fabric can help keep the stone base from migrating into the subgrade. The exact stone depth and support configuration should reflect site conditions and the loaded weight of the container.
Choose a Foundation That Fits the Use Case
There is no single container foundation for every project. The goal is stable bearing, reliable drainage, and a level frame that allows doors, locks, and modifications to operate as intended.
Concrete blocks or precast piers can work for straightforward storage deployments when installed on a compacted base and located under structural load paths. The four corner castings are primary bearing points. Longer containers, units carrying heavy contents, or containers with concentrated interior equipment may need intermediate support. Avoid placing supports randomly under the plywood floor or relying on loose blocks placed directly on soil.
A compacted gravel pad is often a practical choice for temporary or relocatable container storage. It drains well, can be repaired easily, and may reduce site restoration work when the container is removed. Its trade-off is that poor compaction or inadequate edge control can allow ruts and settlement over time, especially where forklift, truck, or trailer traffic crosses the pad.
A concrete slab or engineered pier foundation can be appropriate for permanent offices, commercial conversions, multi-unit layouts, or projects with code-driven anchoring requirements. Concrete provides a predictable finished surface and can integrate utility trenches, accessible approaches, and drainage details. It also requires more upfront planning because drainage, conduit locations, anchor points, curing time, and delivery access need to be coordinated before the container arrives.
In frost-prone regions, foundation elements may need to extend below local frost depth or follow an engineered frost-protected design. In areas with expansive clay, poorly draining soils, or significant slope, an engineer can determine whether soil improvement, deeper piers, retaining work, or a different site layout is needed.
Manage Roof Runoff and Condensate
A container roof sheds water quickly. On a 40-foot container, even a moderate storm can concentrate a meaningful amount of runoff along the long sides. If the surrounding grade is flat, that water can trench the edge of a gravel pad and collect beneath the container.
For basic storage, extending the aggregate pad and maintaining the surrounding slope may be enough. For office containers, retail builds, or units placed beside pedestrian paths, gutters and downspouts are often worth considering. Route downspouts to splash blocks, swales, or an approved drainage system, not directly against the corner supports.
HVAC condensate needs its own plan. A small, steady condensate discharge can keep one section of soil wet throughout the cooling season. Direct the line to a suitable drain location or approved dispersal area, taking care to protect it from damage and freezing where applicable. Reefer containers may also produce water around defrost cycles or washdown activities, so their location should allow for controlled drainage without compromising loading access.
Protect Access, Utilities, and Delivery Clearance
Drainage planning affects more than the foundation. Container doors need a firm, relatively level apron so staff can open them safely and move pallet jacks, carts, or equipment in and out. A drainage swale placed immediately in front of the doors may move water, but it can create a trip hazard or block equipment access. Position drainage features where they protect the site without interfering with operations.
Utility trenches for power, communications, water, and sewer should be coordinated with grading before excavation begins. A trench that settles below grade can become a water channel leading directly to the foundation. Proper backfill, compaction, and surface restoration are part of drainage performance.
Delivery also requires a dry, stable route. Soft soil at the pad edge can limit truck access and make final placement harder. Confirm the delivery path, turning area, overhead clearances, and equipment method before finalizing the foundation layout. A container that must be repositioned after placement can damage a newly finished drainage system.
Common Drainage Mistakes to Avoid
The most frequent problems are usually avoidable: setting containers directly on bare soil, grading the pad perfectly flat, using unsupported loose blocks, and installing gravel without compacting the base beneath it. Another common mistake is directing roof runoff toward doors or under the container because it appears to be the lowest path.
Avoid sealing every edge of the container to the ground. Ventilation beneath the unit helps the underside dry after rain and reduces trapped moisture. At the same time, excessive clearance can make entry less convenient and may require ramps, stairs, skirting, or security adjustments. The right elevation balances moisture management, access, wind considerations, and the intended use.
If water is already standing beneath an installed container, do not assume more gravel alone will correct the issue. First identify the source of water and the available outlet. Regrading, adding a diversion feature, improving downspout routing, or rebuilding a settled support area may be required.
A dependable container site starts with water management that matches the job. Plan the grade, base, supports, runoff path, and access area before delivery, then verify the finished pad after the first major storm. That preparation keeps the container level, usable, and ready to perform for the long term.