
Stop Inspection Failures: NEC Grounding for U.S. Container Office Setup
A shipping container can serve as a durable, cost-effective office, but only when insulation, electrical work, and permits are handled correctly from the start. Before you order a container or hire a fabricator, call your local building department to confirm what triggers a permit in your case. Size, foundation type, and utility connections are usually the three factors that decide it.
TL;DR:
- Permitting requirements depend on size, foundation type, and utility connections, so confirm local rules before ordering or modifying a container.
- A 20ft container offers about 160 square feet, suitable for single-person offices, while 40ft units provide roughly 320 square feet for small teams or meeting areas.
- Insulation with spray foam is essential to prevent steel steel’s heat transfer and condensation issues, especially in humid or extreme climates.
- Electrical grounding and proper bonding of the steel shell are common inspection pitfalls that can delay or invalidate a build if overlooked.
- Costs range from $10,000 to $20,000 for DIY 20ft units and up to $75,000 or more for custom 40ft offices, with permit review causing the most delays.
Table of Contents
- What Is a Container Office Setup?
- Choosing Container Size and Configuration
- Designing the Layout: Windows, Doors, and Data Runs
- Foundation, Anchoring, and Site Prep
- Insulation, HVAC, and Ventilation That Actually Works
- Electrical Planning: NEC Compliance and Grounding
- Interior Finishes and Accessibility
- Budgeting and Timeline for Your Build
- Delivery, Security, and Ongoing Maintenance
- Conexwest’s Approach to Container Office Builds
- Plumbing and Sanitation for Restrooms or Kitchens
- The Real Bottleneck Isn’t the Container
- Get a Turnkey Container Office Without the Coordination Headaches
- Standards and Guidance Worth Reviewing
- Sources
- FAQ
What Is a Container Office Setup?
A container office setup is the process of converting a steel shipping container into a functional workspace through insulation, electrical and data wiring, HVAC installation, and interior finishing. It’s become a standard alternative to trailers and stick-built modular buildings for jobsite offices, satellite workspaces, and small commercial spaces. The term covers everything from a bare-bones 20ft unit with a window unit and folding table to a fully custom 40ft high cube with a conference room and restroom.
Why choose a container office instead of other portable options?
Steel construction gives container offices a durability edge that fabric structures and lightweight trailers can’t match. A container shell resists wind, forced entry, and the kind of daily abuse a construction site delivers. Delivery-to-occupancy timelines also run shorter than site-built construction because the shell already exists. You’re finishing an enclosure, not framing one from scratch.
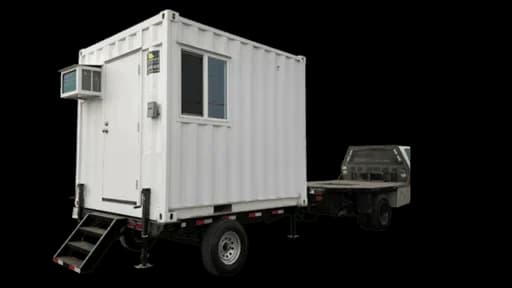
The tradeoffs are real, though. Interior width tops out around 7 feet 8 inches on a standard container, which limits layout flexibility compared to a modular building built to your own footprint. Steel conducts heat fast, so a container without proper insulation turns into an oven in summer and an icebox in winter. Sound also travels differently through corrugated steel than through wood framing, so acoustic treatment matters more than most buyers expect.
Common real-world applications include:
- Jobsite offices for construction superintendents who need a lockable, weatherproof command post near the work.
- Satellite workspaces for companies expanding into a new region without committing to a lease.
- Pop-up client offices at events, sales sites, or temporary retail locations.
- Backup or overflow office space for businesses outgrowing their current building.
Choosing Container Size and Configuration
A 20ft container gives you roughly 160 square feet of usable floor space and works well for a single-person office, a dispatch station, or a compact two-desk setup. A 40ft unit doubles that to around 320 square feet, enough room for a small team, a meeting area, or a reception zone plus private office. High-cube versions of either length add about a foot of headroom, which matters once you factor in insulation, ceiling-mounted lighting, and ductwork that eats into vertical clearance.
The choice usually comes down to site access and budget rather than preference alone. A 20ft container fits on tighter job sites and typically requires a smaller crane or standard forklift for placement. A 40ft unit needs a longer staging area and often a bigger crane, which raises delivery cost, but it spreads fixed costs like HVAC and electrical rough-in over more square footage.
Joining or stacking containers changes the engineering picture substantially:
- Side-by-side joining requires cutting and reinforcing shared wall sections, which almost always calls for engineer-stamped structural drawings.
- Stacking two containers concentrates loads on the corner castings and demands verified foundation capacity beneath each stack point.
- Any structural cutting shifts the project from a simple placement permit to a full building permit review in most jurisdictions, per ICC G5-2019 guidance on repurposed containers.
If your project stays within a single container’s footprint, you’ll generally move through permitting faster and spend less on engineering.
Designing the Layout: Windows, Doors, and Data Runs
Window placement drives daylighting more than any other design decision on a steel box. Place windows on the north or east wall where possible to bring in consistent light without the glare and heat gain that south and west exposures create in most of the country. At least one operable window should meet local egress and ventilation requirements, which varies by occupancy classification, so confirm the minimum opening size with your building department before cutting steel.
Layout templates scale predictably with container length:
- One-person office (20ft): desk area, small storage wall, and a compact HVAC closet near the entry.
- Two-to-three-person office (20ft high cube or 40ft): shared workspace with a partition wall, plus a small meeting nook near the window.
- Four-person office (40ft): two private offices book ending a central shared desk zone, with a small conference table in the middle third.
- Reception plus private office (40ft): entry desk near the door, glazed partition, and a private office at the far end for privacy.
Wiring deserves attention before drywall or paneling goes up. Run conduit and Cat6 cabling during the framing stage, not after, since retrofitting data lines through insulated steel walls is far more disruptive than pulling wire through open stud bays. Decide on your electrical panel location early too. Inspectors need clear working clearance around the panel, and placing it in a corner or behind a door swing is a common mistake that forces rework during final inspection.
Foundation, Anchoring, and Site Prep
Foundation choice affects both permit approval and long-term corrosion resistance. A compacted gravel pad, typically six inches of crushed stone over geotextile fabric, is the most common and budget-friendly option because it drains water away from the container’s bottom rail and reduces the standing moisture that causes rust and corrosion over time. A concrete slab costs more but gives you a level, permanent surface that some AHJs prefer for occupied structures. Pier footings sit in between: less material than a full slab, but they require precise engineering to make sure each corner casting lands on adequate bearing capacity.
Anchoring matters more than most first-time buyers assume. A container is heavy, but wind uplift and seismic loads can still shift an unanchored unit, especially in coastal or high-wind zones. Structural engineers typically specify anchor bolt size, spacing, and footing depth based on your local wind speed map and soil conditions, not a generic template.
Expect your local building department to request a documentation package before issuing a permit:
- Site plan showing container placement, setbacks, and drainage flow.
- Footing detail specifying depth, reinforcement, and bearing pressure.
- Structural notes covering anchor points and any modifications to the container shell.
- Engineer-stamped drawings, required in most jurisdictions once you cut openings or stack units.
Because container-specific rules remain inconsistent across jurisdictions, arriving with a complete package upfront is the single best way to avoid a stalled review.
Insulation, HVAC, and Ventilation That Actually Works
Closed-cell spray foam applied directly to the container’s interior steel skin before framing is a highly effective insulation method because it eliminates air gaps that cause condensation and thermal bridging along steel ribs. Rigid foam board can also be used but requires careful sealing at every seam to perform comparably. Many container office owners regret skipping adequate insulation, as steel without a thermal break tends to sweat in humid climates and transmits heat readily in summer.
Mini-split heat pumps are the standard HVAC choice because they need minimal wall penetrations and handle both heating and cooling efficiently. A 20ft office typically needs 9,000 to 12,000 BTU, while a 40ft unit runs 18,000 to 24,000 BTU depending on climate and insulation quality, according to ContainerCompass’s build guide. Oversizing the unit sounds like a safety margin but actually hurts comfort: an oversized mini-split short-cycles, which leaves humidity uncontrolled and wastes energy.
Pro Tip: Install a basic CO2 monitor once the office is occupied. It’s a cheap way to catch ventilation problems before they become a comfort complaint, and it lines up with the DOE’s FEMP ventilation guidance, which recommends periodic testing and balancing, roughly every five years for many commercial spaces, to keep air quality on target.
Electrical Planning: NEC Compliance and Grounding
Electrical work on a container office falls under the same National Electrical Code rules as any commercial structure, and most jurisdictions require a separate electrical subpermit pulled by a licensed electrician. Skipping this step, or having an unlicensed installer handle it, is the fastest way to fail final inspection or invalidate your insurance coverage.
Grounding the steel shell itself is the detail that trips up the most first-time projects. Because the container body is conductive, it needs to be properly bonded to your electrical system’s ground, typically through a welded lug on a corner casting tied back to the subpanel ground bus. Skip this step and you risk an energized structure and an automatic inspection failure, a problem flagged repeatedly in grounding guidance for container conversions.
A few planning steps prevent most inspection headaches:
- Confirm panel clearance meets NEC working-space requirements before you frame around it.
- Bond the shell with a welded lug and appropriately sized conductor, documented on your electrical drawings.
- Run extra conduit for future data or power upgrades while walls are still open.
- Schedule inspection early in the build sequence rather than treating it as a final step.
Electrical grounding failures rank among the most common reasons container conversions fail their first inspection attempt, largely because installers treat the steel shell like a standard wood-framed wall instead of a conductive structure needing its own bonding path.
Interior Finishes and Accessibility
Vinyl plank flooring handles a container’s structural flex better than tile or hardwood, which crack under the subtle movement steel experiences with temperature swings. Wall systems built as stud framing over your spray foam layer give you a standard surface for drywall, paint, or paneling, and they leave room to run wiring behind the finish without touching the steel.
If the office will see public visitors, ADA-compliant ramps and threshold transitions become a real design constraint, not an afterthought. A container’s floor typically sits higher off grade than a slab-on-grade building, so ramp length and slope need to be calculated into your site plan early.
A few finish details prevent long-term headaches:
- Prime and paint any cut edges immediately to stop rust from spreading along exposed steel.
- Add a vapor barrier detail at wall-to-floor junctions to control condensation.
- Install acoustic panels or a suspended ceiling to soften the echo steel walls naturally create.
Budgeting and Timeline for Your Build
Costs vary widely depending on how much you do yourself versus hand off to a fabricator, and insulation, HVAC scope, and permit requirements swing the number more than the container itself does.
| Approach | Typical Cost Range | Timeline |
|---|---|---|
| Basic DIY 20ft | $10,000–$20,000 | 4–8 weeks |
| Prefab turnkey 20ft | $15,000–$35,000 | 2–6 weeks |
| Custom 40ft | $35,000–$75,000+ | 8 weeks |
These bands come from Metal-Buildings.org’s cost breakdown, and the widest swings within each range trace back to container condition, insulation method, and how much electrical and HVAC work the project requires. Engineered structural work for cut openings or stacked units adds both cost and time, since it typically means a slower permit review.
Permit review is the single biggest source of delay on most container office projects, more than delivery logistics or fabrication schedules. An incomplete submission, missing a site plan or structural note, can bounce a permit application back for revisions and add weeks to a timeline that otherwise moves quickly.
Delivery, Security, and Ongoing Maintenance
Getting a container onto your site takes planning that has nothing to do with the build itself. Most deliveries use a tilt-bed truck combined with a crane or heavy forklift for final placement, so confirm your driveway width, overhead clearance, and staging area before delivery day. A site that looks accessible on paper can still turn into a logistics problem if there’s no room to maneuver a 40ft trailer.
Security upgrades are worth budgeting for even on a modest build. Upgraded lock hardware, motion-activated exterior lighting, and a basic camera or WiFi repeater system for connectivity all add meaningful protection for a relatively small cost increase.
A simple annual maintenance rhythm keeps the structure reliable for years:
- Inspect roof seams and seals each spring for water intrusion before it becomes a bigger repair.
- Touch up rust spots on exterior paint as soon as they appear.
- Service the HVAC system annually, including filter changes and a coil cleaning.
- Test and balance ventilation periodically, following the same cadence DOE’s FEMP guidance recommends for commercial indoor air quality.
Conexwest’s Approach to Container Office Builds
Some companies work with businesses moving through this process, from container selection through customization and delivery. A clear procurement checklist keeps a build on track:
- Confirm permit requirements with your AHJ before ordering.
- Select container size and condition based on layout needs.
- Specify customizations (windows, doors, electrical rough-in) at order time.
- Coordinate delivery logistics and site access in advance.
- Schedule inspections early in the fit-out sequence.
Plumbing and Sanitation for Restrooms or Kitchens
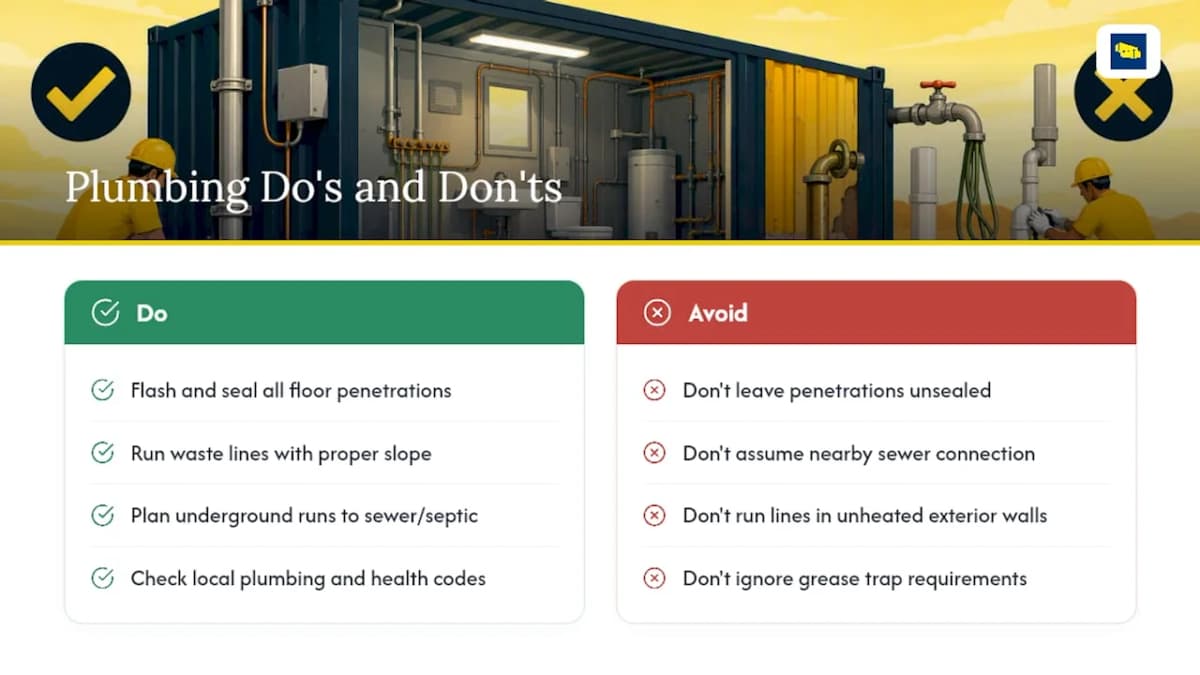
Adding a restroom or small kitchenette to a container office introduces plumbing considerations that a standard office build skips entirely. Water supply and drain lines need to run through the container floor or walls, which means additional cutting and sealing beyond what a typical electrical or HVAC penetration requires. Every penetration through the steel floor needs proper flashing and sealant to prevent water intrusion into the space below the container.
Waste lines require a slope toward the connection point, and because containers sit above grade on a foundation, connecting to municipal sewer or a septic system often means running lines underground from the container’s drain outlet to the connection point. This detail catches some buyers off guard, since it can add meaningful cost if the connection point sits far from the container’s placement.
Local plumbing codes govern fixture requirements, trap sizing, and vent placement, and these rules apply to a container office the same way they’d apply to any commercial building with a restroom. If you’re adding a kitchenette, grease trap requirements may apply depending on what kind of food preparation happens on site, so check with your local health department alongside your building department.
Cold climates add another layer of planning: water lines running through an insulated but unheated section of the container risk freezing during power outages or extended vacancy. Locating plumbing runs within the insulated, conditioned envelope of the office, rather than along an exterior wall, reduces that risk substantially.
The Real Bottleneck Isn’t the Container
Most of the skepticism around container offices misses the actual failure point. The steel shell is rarely the problem. Containers are built to survive ocean transport, so structural durability is a solved problem before you even place an order. Where projects actually stall is permitting, electrical grounding, and insulation shortcuts, all of which are decisions made by the people managing the build, not limitations of the container itself.
Conventional advice tends to focus on the container as a product, comparing wall gauges and paint types, when the bigger risk sits in coordination. A project with a licensed electrician, an engineer-stamped foundation plan, and a complete permit package submitted upfront moves faster than a cheaper build missing any one of those three pieces. Speed doesn’t come from a bigger budget. It comes from sequencing the permit-sensitive decisions first instead of treating them as paperwork to handle after the container arrives.
If there’s one priority worth fixing before anything else, it’s this: get your local building department on the phone before you finalize container size or foundation type. That single call shapes nearly every decision that follows, from anchor bolt specs to whether you need engineer-stamped drawings at all.
— Conexwest
Get a Turnkey Container Office Without the Coordination Headaches
Certain providers remove common friction points in a container office build: managing multiple vendors for the container, the modifications, and the delivery. Ordering office containers directly means the shell, window and door cutouts, and electrical rough-in come from one source, with engineered drawings available to support your permit submission rather than leaving you to piece that documentation together yourself.
Conexwest’s online configurator lets you specify size, insulation, and layout in a few clicks, then handles container customizations like windows, doors, and HVAC penetrations through its own fabrication process rather than a subcontractor. Delivery services can cover placement logistics nationwide, reducing the need to coordinate separate crane and trucking services that often slow down DIY builds. If you’re ready to move forward, browse shipping containers for sale and request a quote for your configuration today.
Standards and Guidance Worth Reviewing
- ICC G5-2019 for repurposed container guidance.
- DOE/FEMP ventilation guide for IAQ practices.
- Permit checklist resource for AHJ requirements.
Sources
- ICC G5-2019 Guideline for the Safe Use of ISO Intermodal Shipping Containers
- Ventilation assessment and action guide — U.S. Department of Energy (FEMP)
- Complete Guide to Shipping Container Permits (2026)
- Metal-buildings
- Shipping Container Office: Cost, Build Guide & Real 10-Day Conversion | ContainerCompass
FAQ
How Much Does It Cost to Build a Shipping Container Office?
Costs typically range from $10,000 to $20,000 for a basic DIY 20ft build, $15,000 to $35,000 for a prefab turnkey 20ft unit, and $35,000 to $75,000 or more for a custom 40ft office, according to Metal-Buildings.org. Insulation method, HVAC and electrical scope, and permit or engineering requirements drive most of the variation within each range.
Can I Legally Use a Shipping Container as an Office?
Yes, in most jurisdictions, as long as it meets local building codes for insulation, electrical work, and foundation type. A permanent, occupied container almost always requires a building permit, and the deciding factors are typically use, foundation permanence, and utility connections, so confirm requirements with your building department before starting.
How Much Does a 40-Foot Container Office Cost?
A custom 40ft container office generally runs $35,000 to $75,000 or more, depending on interior finish quality, HVAC and electrical scope, and whether structural engineering is required for cut openings. Container condition and site-specific foundation work also affect where a given project lands within that range.
How Do You Convert a Shipping Container Into an Office?
The typical build sequence involves inspecting and treating the shell for rust, reinforcing any cut openings, applying closed-cell spray foam insulation, then framing interior walls before running electrical and data conduit. A 10-day conversion timeline is realistic for prefab builds, while custom builds with structural modifications or utility connections take considerably longer. Conexwest offers turnkey ordering with fabrication and delivery services if you’d rather skip managing each step separately.